Mar 28 2010

Performance Art in Auckland

Published by under Art Antics

I went up to Auckland with the class and decided to do some performing art.  I dressed as a bag lady and spent a couple of hours on the street scavenging and trying to make a connection with other people.  One thing that surprised me was the ease at which I was able to walk down the footpath.  Everyone gave me a wide berth…lol… There was no stepping aside to let some one pass for me.  A small positive in a morning of being ignored or stared at.   Well here it is.

3 responses so far

Mar 21 2010

The eyes have it!!

Published by under Art Antics

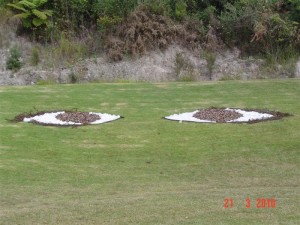
Caption: The Eyes Have It

Well had some great fun today. Spent the morning making some land art at a local art day.

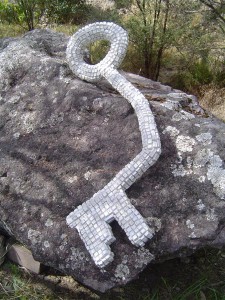
The Te Puna Quarry Park in conjunction with Environment BOP put on a funky junk  and environmental art day.  They were looking for art made out of recycled materials as well as environmental art.  There were some very clever and inspiring creations in the recycled funky junk section.  I had entered my “Bent Key” and achieved first place in the Creativity section.  So that was great.  I won $100.00.  That will help with the cost of some of the materials for school. Heres a photo:

Caption: Bent Key, recycled keys off computer keyboard

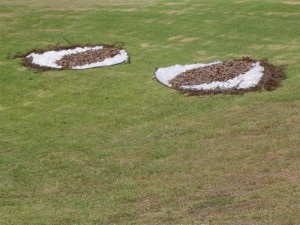
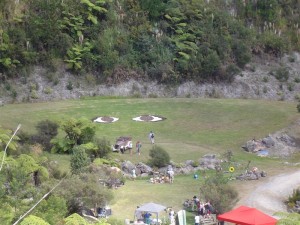
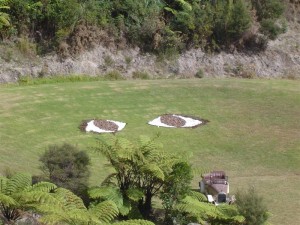
I had the most fun with the environmental or land art.  I used old dead punga fonds for the outline of the eyes and leaves for the pupils.  Filled in the white with some white carded wool that I had for another installation that I will be doing for school at the end of the term.  Only now Ill have to spend a bit of time getting the leaves and sticks out of the wool. LOL.

Caption: Close up of eyes.

Caption: Eyes from the side

Caption: Overview from above

It was a great day.  I think I would like to do some more land art.  :)

No responses yet

Mar 11 2010

Finally Finished Head

Published by under Art Antics

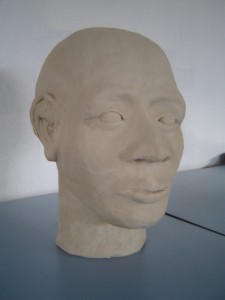
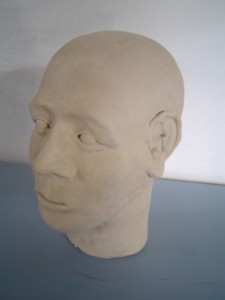
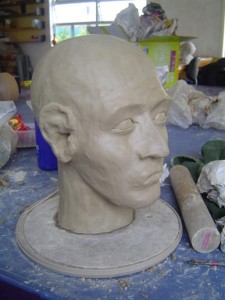
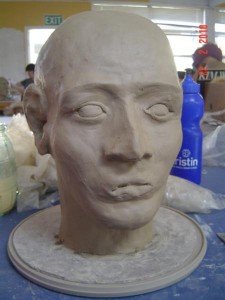
Well here are a couple of photos of my head all finished.  Not too bad for my first one.  One side of the face looks a bit droopy, but hey,maybe he was drunk ….lol..  The mouth needs some work, but Ive mucked around on this for too long as it is, need to just get it finished.

Caption: Finished Greenware Head I

And here it is from the other side:

Finished Greenware Head II

Caption: Finished Greenware Head II

Just got to put it through for a bisque and then a stoneware firing and hope it doesn’t blow up. LOL.

No responses yet

Feb 22 2010

The Head…continued….

Published by under Daily Dribbles

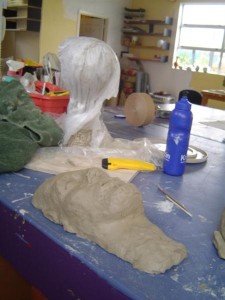
Well here is my head cut in half. Well the clay head I made, not MY head….LOL. Mine got stuck on the plastic, but I got it off eventually.  Here it is all flat and funny looking.

Caption: Front Half of head removed from armature.

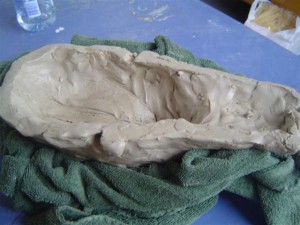
And here is half of the head turned over so I could scoop out the excess clay.  This is where you try and make sure most of the walls are the same thickness.  You need to add wet clay to the inside with slurry where the wall is too thin.  Wow it sure looks funny. Having them off the armature like this meant that they spread out a bit making the task of putting them back together somewhat harder.  Plus I ended up with the back of the head flat. LOL  Flat Head…..rotflmao.

Caption: Scooping out excess clay.

Caption: Putting the two halves back together
We put the two halves back together again.  This was a job and a half for one person, so a lot of us helped each other out.  The sides don’t meet properly as the head has got a little distorted.  You couldn’t wait for the clay to get too hard before cutting it in half as it wouldn’t be able to be joined up again very successfully.  However too wet and it distorts too much and puts too much strain on the clay, especially in places like under the chin or wherever there is sharp angles and heavy weight pulling the clay in a particular direction.  Once you have scored the two halves where they will be joined and put lots of slurry on you gently push the two halves together.  Using a separate coil of clay you help bridge the two halves by merging the coil into the seam.
Caption: Build up the neck and smooth some of the face out.

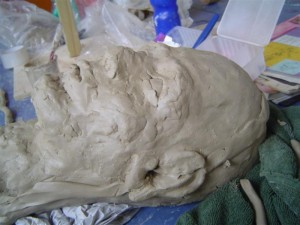
I did some repair work, mostly around the neck that needed building up to support the head better.  Smoothed out the worst of the rough bits, and did some more work on matching one cheek, cheekbone and jaw line with the other on the other side of the face.

Finally I started working on the eyes, eyelids and folds around the eyes.  It took me all day to get one eye looking at least similar to the other.  It was either too low or too small or just TOO  something.  That was the hardest to fix….the TOO SOMETHING….LOL cause it took a long time to figure out what the something was.

As you can see it wasn’t easy.  The one on the left was great,  it was just trying to get the one on the right.  oh well, I think Ive got the worst of it done now….

Ill be back to post some more photos soon.

No responses yet

Feb 16 2010

BACK AT SKOOL……..WAHOOOO

Published by under Art Antics

Its great being back at school.  We have been learning about sculpting busts over the last two days.  I have found it … Frustrating, fun, absorbing, theaputic, soothing, exiting, wonder making (ie wonder what it will look like if I do this….LOL..)  Any how here are some shots of my work in progress.
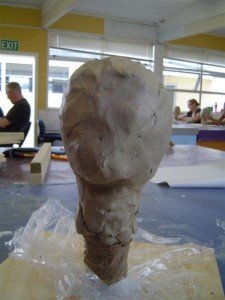
Caption: Covering the armature with wet clay

First we made an armature out of a wood post screwed upright onto a square base board.  We covered it with a large paper ball on top of the post.  The paper had to be packed together to make a solid base to put the clay on.  Plastic is pulled tight over the ball and down the post with tape.  This is so the head can be removed easily and also so the clay doesn’t stick. We then built up the Southern Stoneware clay over the top, by attaching it a small piece at a time.  The Clay comes from the south island.  Our tutor likes to use local clay, not imported clay.  Hey makes sense to me.

We needed to get the coverage fairly thick to enable plenty of depth to carve features out later and yet not too thick or the clay would sag and/or make more work later when we hollow out the head from the inside.  As we attached the wet clay a piece at a time we attempted to get a general head shape.
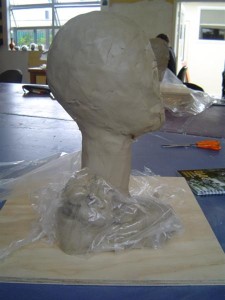
Caption: Side view of bust, first stage

As you can see however the jaw line was not defined enough and the whole face slopes outwards on an angle at the bottom of the jawline.   So with a push here and a cut there I managed to remove quite a bit of the jaw underneath and add more on the side to give him a better jaw line.  I also made the face more perpendicular by cutting straight down from the forehead.
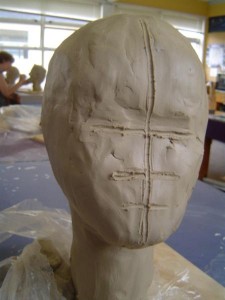
Caption: Marking out the facial features, stage 2.

The next stage was to mark out where the eyes, nose and mouth would go.  The jaw line needed looking at again and I think I placed the eyes too high bringing up the rest of the face too high as well.  So I added the features down some what.   I think now that I should have moved them down even further.
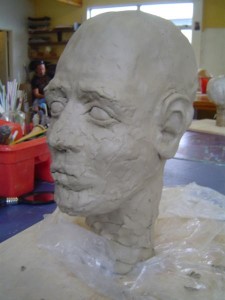
Putting on the facial features, stage 3, side view.

Caption: Putting on the facial features, stage 3 side view.

I.didn’t bother to try and make it look like anyone specific, it was hard enough doing the proportions.   AND THE EARS…. god they are the hardest….  Ill have to do some drawings of ears to get a better handle on how they are constructed.
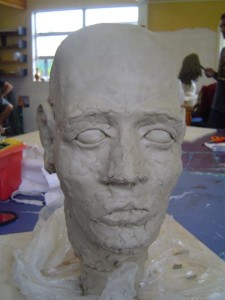
Caption: Putting on the facial features, stage 3 side view.

The next thing we have to do is cut the bust in half and remove the armature.  Whoppee what fun… LOL.   Ill have a go at that tomorrow.
No responses yet

Next »